
Why Does My Sewing Machine Keep Skipping Stitches?
You’re sewing along, admiring what appears to be a perfectly respectable seam, when you notice something strange.
Stitch. Stitch. Stitch….Gap…Stitch. Stitch. Another gap.
Your sewing machine has apparently decided that some stitches are optional.
Before you start turning tension dials, changing settings, or questioning whether you were ever meant to sew in the first place, there’s something important to know:
Skipped stitches are information.
Your sewing machine isn’t randomly choosing which stitches it feels like making. Something is interfering with the process that forms a stitch. And most of the time, we can figure out what it is.
We don’t guess. We debug.
Let’s make it make sense.
Quick Answer: Why Is My Sewing Machine Skipping Stitches?
A sewing machine commonly skips stitches because of a dull, bent, incorrectly installed, or wrong-type needle. Incorrect threading or a mismatch between the needle, thread, and fabric can also interfere with stitch formation.
Before adjusting your tension, start with the simplest variables: check your needle, check your threading, and think about what changed.
First, What Is a Skipped Stitch?
To understand why your machine skips a stitch, we need to understand what it was trying to do in the first place. Your sewing machine uses two threads to form a stitch: the upper thread coming through the needle and the bobbin thread underneath.
As the needle travels down through the fabric and begins moving back up, it creates a small loop of upper thread. The hook underneath the needle plate catches that loop and carries it around the bobbin thread.
The two threads lock together. You get a stitch. When that little meeting doesn’t happen correctly, the machine keeps moving—but a stitch doesn't form. That's the gap you're seeing.
Think of it as a very tiny missed handshake inside your sewing machine. Both parties showed up. The timing was just off. Once you understand that, skipped stitches become much less mysterious.
Something prevented the upper thread and hook from connecting correctly. Our job is to find out what.
Before You Change Anything, Ask: What Changed?
This is one of my favorite troubleshooting questions because it immediately gives us useful information.
Was your machine sewing correctly five minutes ago?
If yes, something probably changed. Maybe you changed fabric. Maybe you changed thread. Maybe you replaced the needle. Maybe you started sewing over several thick layers. Maybe you rethreaded the machine. Or maybe absolutely nothing seems different, which is also useful information.
This is calm debugging. Instead of changing six settings and hoping one of them works, we're going to check one variable at a time. Because if you change everything at once and the problem disappears, congratulations—you fixed it.
Unfortunately, you have absolutely no idea how. Let's avoid that.
1. Check Your Needle First
If my sewing machine suddenly starts skipping stitches, the needle is one of the first things I'm checking. Not the tension dial. Not seventeen mysterious settings. The needle.
Sewing machine needles don't last forever, and they don't always look damaged when they are. A needle can become dull or slightly bent after repeated use. It can also develop a tiny burr that's difficult to see.
Any of those changes can interfere with how the needle passes through the fabric and how the upper thread loop forms underneath. If you don't remember the last time you changed your needle, that's useful data.
Put in a fresh one and test again.
It's inexpensive, takes about a minute, and eliminates one very common variable immediately. Your needle may simply be submitting its retirement paperwork. Let it go.
2. Make Sure the Needle Is Installed Correctly
A brand-new needle can still cause skipped stitches if it isn't installed correctly.
Check your machine's manual to confirm which direction the flat side of the needle should face. Push the needle all the way up into the needle clamp before tightening it securely.
This matters because the needle has to be positioned correctly for the hook underneath to catch the upper thread loop. A needle that's sitting too low, facing the wrong direction, or not fully inserted changes that relationship.
Remember the tiny handshake? We've just moved one person's hand. Machines respond to inputs.
3. Check Whether You're Using the Right Needle for Your Fabric
Here's where fabric enters the equation. Different fabrics behave differently when the needle passes through them, which is why sewing machine needles come in different types and sizes.
If your machine sews beautifully through quilting cotton but suddenly starts skipping stitches when you switch to a stretchy knit, that's a very useful clue.
The machine didn't suddenly forget how to sew. The fabric changed.
For example, woven fabrics often work well with a universal or sharp needle, while knit and stretchy fabrics may need a ballpoint, jersey, or stretch needle.
Heavy fabrics such as denim may require a stronger denim needle. The goal isn't to memorize every needle in the sewing aisle. It's simply to start noticing the relationship:
Needle + thread + fabric = a system.
Change one part of that system, and you may need to adjust another.
4. Rethread the Sewing Machine
If the needle checks out, move to the upper threading. Take the thread completely out of your machine and rethread it from the beginning. Yes, even if you're pretty sure you threaded it correctly.
Especially then. Raise the presser foot before threading so the tension discs can open and allow the thread to seat properly. Follow the entire thread path and make sure you haven't skipped a guide or missed the take-up lever.
Don't try to find the one potentially incorrect section and fix it halfway through. Start over. It takes another minute, and now you've eliminated another variable. This is why learning how to thread your machine correctly is so important. Threading isn't just a setup task—it directly affects what happens when the machine tries to form a stitch.
Related: How to Thread a Sewing Machine for Beginners
5. Check Your Thread
Thread usually isn't my first suspect with skipped stitches, but it belongs in the system. If you've recently switched to a very thick, very fine, old, or poor-quality thread, ask whether it works well with the needle and fabric you're using.
Thread needs to move smoothly through the needle eye and through the machine's threading system. If it can't, stitch formation can become inconsistent. This is another reason I don't recommend changing several variables at once.
If your machine was sewing perfectly, you changed the thread, and skipped stitches appeared immediately afterward...Well. The machine has left us a fairly obvious clue. Sometimes debugging is less Sherlock Holmes and more noticing what happened five minutes ago.
6. Look at Your Fabric
Certain fabrics are simply more demanding. Stretchy knits, very thin fabrics, slippery materials, thick seams, and multiple layers can all change how the needle travels through the fabric.
If the skipped stitches happen only in certain areas—such as when you're crossing a thick seam—that tells us something too. Don't pull the fabric through the machine to "help."
The feed dogs are designed to move it. Pulling can deflect the needle slightly, which is exactly what we don't want when we're trying to get the needle and hook to meet consistently.
Guide the fabric. Let the machine feed it. You're steering, not entering a tug-of-war.
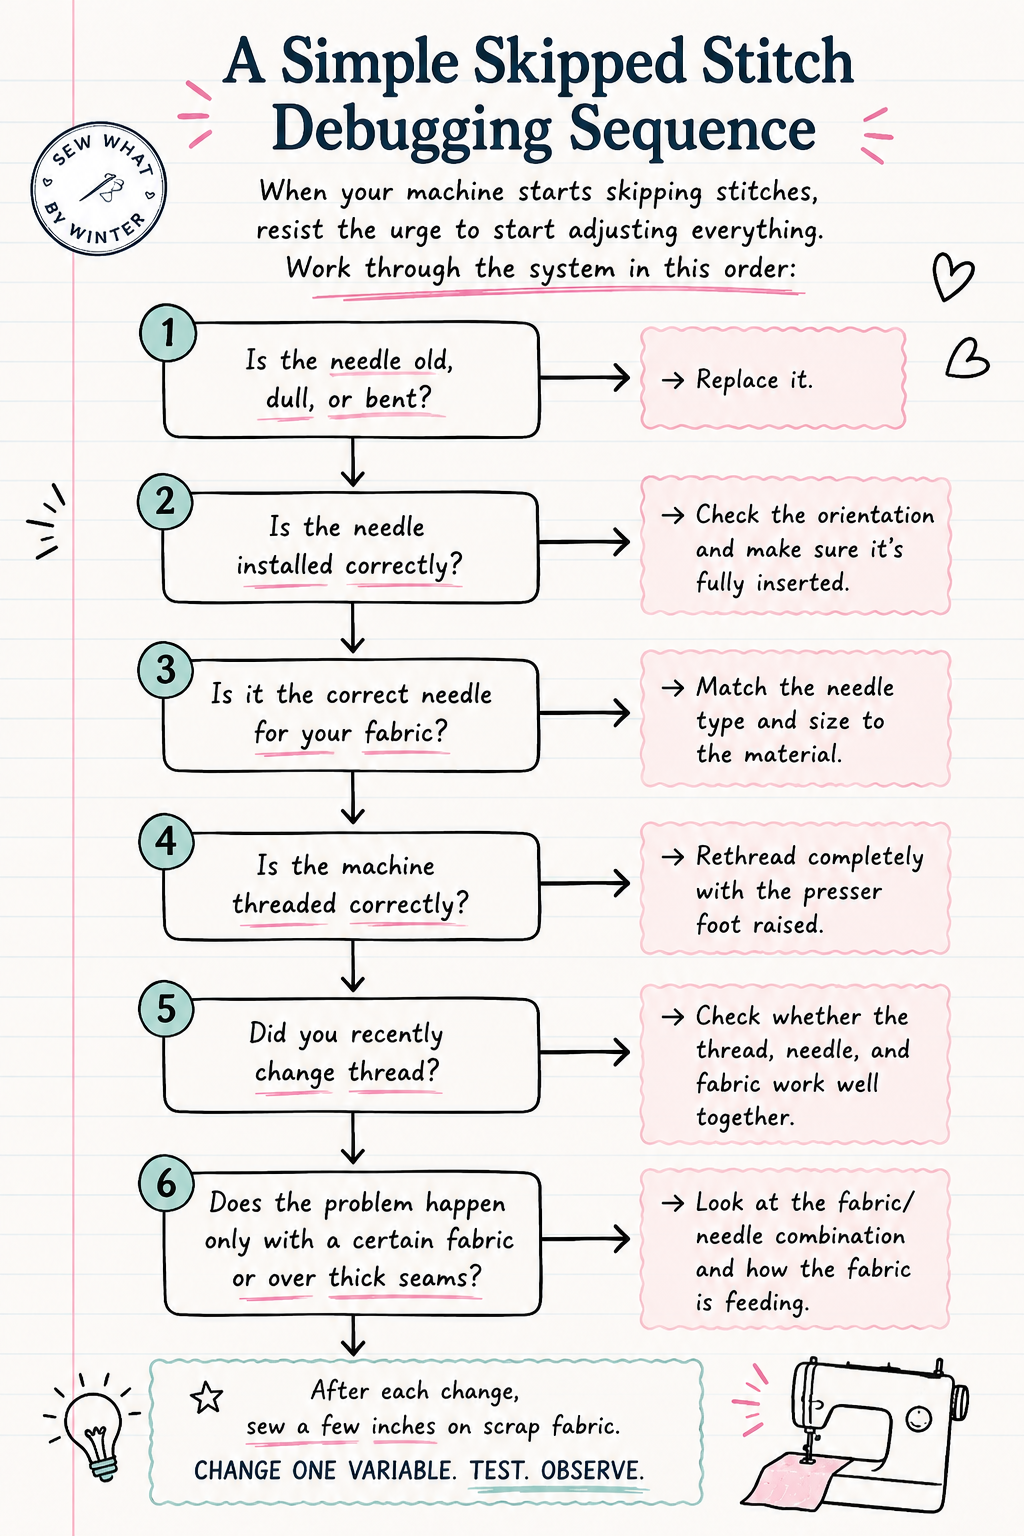
A Simple Skipped Stitch Debugging Sequence
When your machine starts skipping stitches, resist the urge to start adjusting everything.
Work through the system in this order:
Is the needle old, dull, or bent?
→ Replace it.
Is the needle installed correctly?
→ Check the orientation and make sure it's fully inserted.
Is it the correct needle for your fabric?
→ Match the needle type and size to the material.
Is the machine threaded correctly?
→ Rethread completely with the presser foot raised.
Did you recently change thread?
→ Check whether the thread, needle, and fabric work well together.
Does the problem happen only with a certain fabric or over thick seams?
→ Look at the fabric/needle combination and how the fabric is feeding.
After each change, sew a few inches on scrap fabric.
Change one variable. Test. Observe.
That's how you learn what actually fixed the problem.
Sew What Tip: Don't Touch the Tension Dial Yet
Tension gets blamed for an impressive number of sewing problems. Sometimes it deserves it. Often it doesn't.
If your machine starts skipping stitches, I would not immediately start turning the tension dial. Check the needle and threading first.
If you adjust tension before ruling out the basic variables, you can accidentally create a second problem while trying to solve the first one. And now we're debugging our debugging. Nobody has time for that.
What If My Sewing Machine Is Still Skipping Stitches?
If you've installed a fresh, appropriate needle, checked that it's positioned correctly, completely rethreaded the machine, checked your thread and fabric combination, and you're still consistently getting skipped stitches, the problem may need a closer look.
At that point, check your machine's manual for model-specific troubleshooting recommendations.
If the problem continues across different fabrics, needles, and threads, it may be time to have the machine serviced. Issues involving hook timing or other internal mechanical adjustments aren't something I'd recommend a beginner start changing at home.
There is a difference between debugging and disassembling your sewing machine because the internet gave you confidence. We know our boundaries.
Skipped Stitches Aren't Failure. They're Data.
This is the part of sewing I wish more beginners were taught. When something goes wrong, your first question doesn't need to be: What am I doing wrong?
Try: What changed?
A skipped stitch is a clue. Thread bunching is a clue. A tangled bobbin is a clue.
Your sewing machine is a mechanical system responding to its inputs. Once you understand that, troubleshooting becomes much less personal—and much more useful.
Version one is data.
Change one variable. Test again. See what happens. That's how sewing starts making sense.
Want Help Debugging Your Sewing Machine?
If your sewing machine starts doing something strange and your first thought is, I don't even know what to check, I made something for you.
The free Sew What Debug Guide gives you a simple way to troubleshoot common beginner sewing problems without randomly changing settings and hoping for the best.
Inside you'll find If X Happens → Check Y flowcharts, a tension troubleshooting map, simple decision trees, and “What Changed?” prompts to help you work through problems one variable at a time.
→ Download the Free Sew What Debug Guide
No panic. No random knob turning. Just calm debugging. Because sewing isn't random.
Let's make it make sense.
Frequently Asked Questions
-
A new needle can still cause problems if it's the wrong type or size for your fabric, isn't pushed completely into the needle clamp, or is installed in the wrong direction. Check your machine manual for the correct needle orientation and make sure you're using a needle appropriate for your fabric.
-
Stretch fabrics can require a stretch, jersey, or ballpoint needle depending on the material. If your machine works normally on woven cotton but skips stitches on knits, your needle-and-fabric combination is one of the first variables to investigate.
-
Yes. If the upper thread misses a guide, the take-up lever, or isn't seated correctly in the tension system, it can interfere with proper stitch formation. Completely rethread the machine with the presser foot raised and test again.
-
Not first. Start with the needle, threading, thread, and fabric. Adjusting tension before checking those basic variables can create additional stitch problems.
-
Intermittent skipped stitches can still point to a needle, threading, or fabric issue. Pay attention to when they happen. If they're occurring over thick seams, with a particular fabric, or immediately after changing thread or needles, you've found an important clue.
